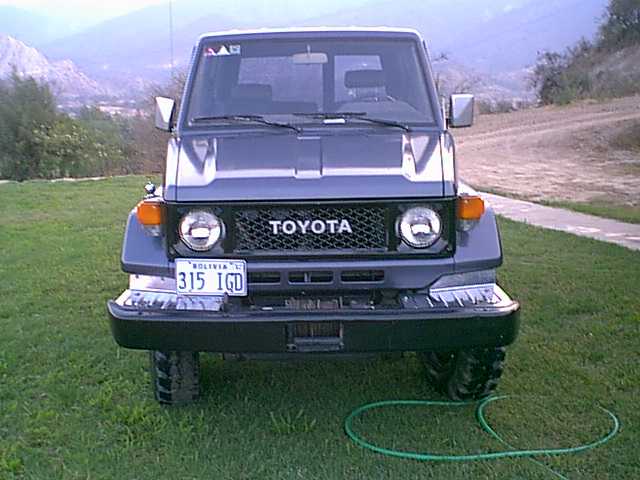
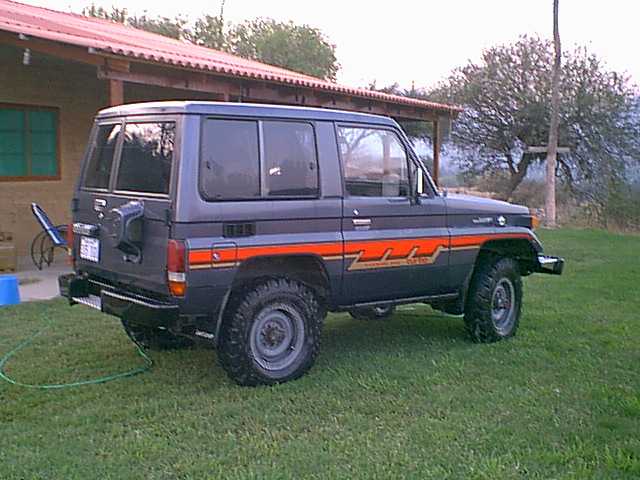
A 1986 Toyota
FJ70 Engine Change from 3F Petrol to a 14BT Turbo-Diesel
By: Jeff Waltermire N8ZUZ1 “at” yahoo.com
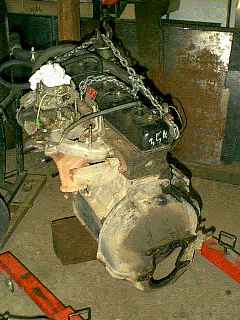
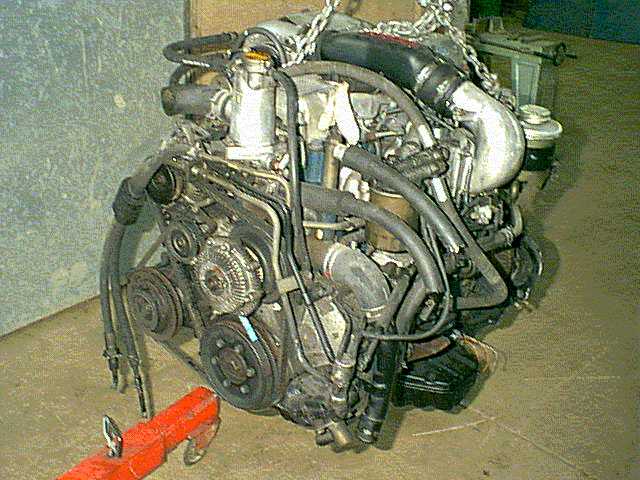
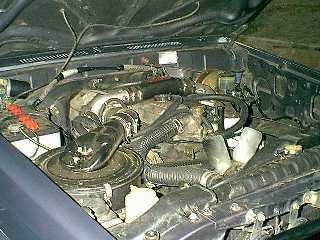
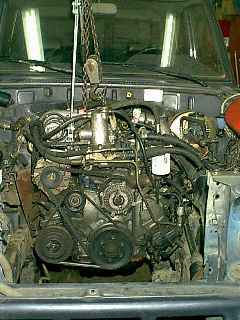
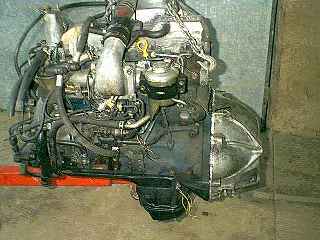
Here's the
vehicle ready for a "heart" transplant.
The under-powered gas guzzling 3F ------>
to the
turbo-charged, direct injected 14BT
My goal
for the swap: I have an FJ70 (I guess now it's a
BJ70) SWB Toyota Landcruiser in Bolivia, South America, with the stock
3F engine that got about 10 mpg (just over 4 km/L) in the city and/or
also on long road trips. It didn't have much power either.
It was mated to the very desirable H55F transmission, which includes a
low first gear and a 5th gear overdrive. With the 3F the low gear
wasn't quite what I would call "granny" but it was lower than one
needed to start going on the road. I used 1st gear on really bad
roads where you just need to crawl. I typically started from a
stop in 2nd gear. I was looking for a diesel engine to swap into
my TLC so I could gain better fuel economy and hopefully have more
usable power. I was looking for a Toyota 13BT, 1HZ, or the
14BT. I opted for the 14BT because the price was within $100 to
the 13BT, the extra 20 horsepower would be nice, and the 14BT has a
built in gear driven vacuum pump so no weird alternator
(alternator/vacuum pump combo) to worry about during the
conversion. Both the 13BT and 14BT use a gear driven power
steering pump. The 14BT uses a rotary style injection pump, which
I am told runs quieter, instead of the inline pump on the 13BT. I
never did find a 1HZ for sale in all my scouring with the engine
importers in this country. Most all the diesels that are imported
used from Japan here are of the 24 volt variety. I did not want
to move my transmission neither forward nor aft because I have a PTO
winch and I wanted that to still work. I didn't want to mess with
lengthening or shortening driveshafts and PTO shafts. Well, on to
the story...
I did most all the work myself with
just a little help from a couple of friends (Roger and Daryl).
The
only things I didn't do were make the AC hoses, rebuild the AC
compressor, make and install the exhaust, and weld the engine mounts as
I had a pro handy when it came time to do that.
Changes
that took place: First things first, I am an aircraft
mechanic. I carry that mindset into my automotive
mechanics. Whenever
I have easy access to a rear main seal I
change it just like I always replace throw-out bearings when I have
easy access to them. So, the first thing I did was change the
rear main seal as I don’t want to have to change it in a year or two
because it’s leaking. I then started to get everything mated
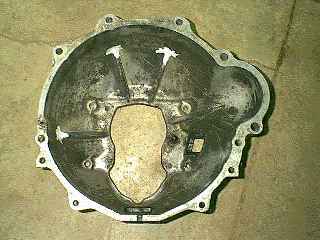
together outside the vehicle. The bell housing off of a Toyota
13B (normally aspirated) had the proper bolt pattern for the H55F
transmission and the 14BT engine. It was too shallow inside for
the pressure plate assembly from the 14BT as it touched in three places
(on 3 ribs). The 14BT pressure plate and spring assembly is
heavier duty than a 13B series to handle more torque/HP. The 13B
bell housing is about 3/8" shorter than the one from the 3F (from the
transmission mounting surface to the flywheel clutch surface) so I
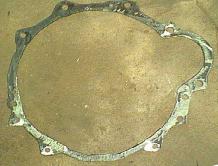
added a 3/8" plate cutout to the lip of the bell housing that goes
between the engine and bell housing. Even with this spacer I
needed to remove material on 3 ribs inside the bell to accommodate the
larger pressure plate of the 14BT. I also needed to open up the
(8) shape at the rear of the bell housing as the transmission (8) was
larger by about 1/8" on each side. The throw-out bearing from the 13B
was too small to slide onto the transmission input shaft. I had
to use the same type of bearing and the lever arm from the gas
engine. The splines on the input shaft are coarse for the 3F so I
used a clutch disk for a 3F since both the 14BT and the 3F clutch disks
are 275mm in diameter. I then bolted the transmission/transfer
unit to the 13B bell, to the 14BT. 3 ribs with material
removed
3/8" plate
spacer
spacer
w/bell
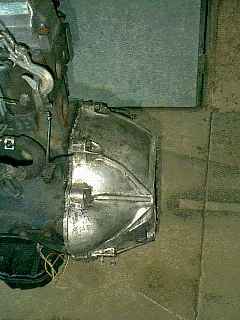
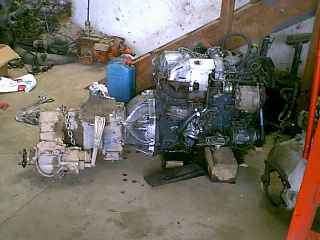
H55F mated to 14BT
Remember I didn't want to move the
transmission so before the engine mounts were fabricated, or any
welding was done, the transmission was mounted in place as one unit
with the engine and everything was leveled from left to right.
The engine mounts were fabricated with 1/4" steel plate. I used
the 3F rubber mounts because they were in a lot better shape than the
ones supplied from the engine importer. First I bolted the rubber
mounts to the engine. I then made the flat pieces that go to the
rubber mounts with elongated holes (using the old mounts as a
pattern). I had cut the steel after first making cardboard pieces
to make sure the sizes and angles were correct. I then bolted the
elongated hole pieces to the rubber mounts then placed one side of the
frame mount in place and tack welded it to the elongated hole
piece. I didn’t weld anything to the frame yet. I did the
same with the second piece that would get welded to the frame. I
unbolted the tacked pieces from the rubber mount and finish welded the
mount together outside the vehicle. I put it back into place then
MIG welded the mounts to the frame. The turbo has about 1/2" clearance
with the firewall. The starter also has about 1/2" clearance with
the frame rail.
In converting from 24volts to 12v I
had to change the starter, the fuel cutoff solenoid, the alternator,
the water temperature sending unit, and the AC compressor clutch.
I removed the intake heater used for really cold weather as I don’t
really need it. The starter was changed from 24v to 12v using the
motor and solenoid body from a "2L" Toyota (commonly found in
diesel 4-runners and pickups) but keeping the internal gear reduction
drive from the 14BT. The 24v fuel cutoff solenoid was changed to
a 12v Zexel (Bosch Automotive System) PN: 9 461 610 530 - 753
146650-0720 but the o-ring was replaced with a larger one similar to
the original solenoid. The Bosch one was the only one close that
I could find in this country even though it wasn't perfectly identical
physically. I used a GM Delco-Remy alternator that was lying
around, as I only had to change the pulley from the 3F
alternator. The mount was completely different for the 3F
alternator to work yet the Delco fits perfectly on the 14BT with a
couple of washers used for spacers on the aft side of the pivot
mount. This cleans up the wiring too, as the Delco-Remy doesn't
need much for wiring. All I did was run the wire for the
alternator light to the spade #1, and spade #2 goes right to the
alternator output lug to bring power to the field. The alternator
output goes directly to the battery terminal. Easy huh? I
had an air-conditioning shop change out the AC compressor clutch to a
12v one when they made all new lines for my AC.
The starter/battery wire had to be
moved from right to left by going up to the firewall, across the
firewall, then down to the starter using a new cable. It's
wrapped in electrical tape and wire protectors then secured with
ties. The wire from the points and from the starter solenoid had
to be moved to the left side and they run with the battery/starter wire
across the firewall. The old points wire now runs the fuel cutoff
solenoid.
The clutch hydraulic line was
shortened to go straight down from the master cylinder instead of
crossing to right side along the firewall then down. I just bent,
cut, and flared the existing line. I had to use a different slave
cylinder of the same diameter but shaped differently with a closer bolt
pattern so it would bolt up to the existing holes on the 13B
bell. The arm from the gas engine is longer so I made a spacer to
move the cylinder out further and push directly on the arm instead of
at an angle.
The fuel tank was drained and all
fuel lines were drained of gasoline before continuing. The fuel
lines had to be lengthened because the old ones run along the right
side of the vehicle and the injection pump is on the left side. I
used the old steel vacuum line (since the brake master cylinder is on
the same side now as the vacuum pump) that went from left to right for
my fuel supply line since it was a clean line and already in
place. I used a rubber line for the fuel return line from the
injection pump and used the existing fuel return lines to the tank that
came from the old gas fuel pump. The thermostat housing was too tall
(it would have touched the hood) and it pointed to the right yet the 3F
radiator has the top inlet on the left and the outlet on the right. I
took my 3F radiator to a radiator shop and had them move the
inlet/outlet to the other sides. I used a thermostat housing off
of a 13B because it’s much shorter. There are two problems with
this as this housing isn't setup for the turbo cooling lines. I
now had two overflows (one on the radiator and one on this
housing). I welded the aluminum housing's outlet shut for the
overflow so it can't overflow there anymore. I then drilled holes
in the heater inlet/outlet tubes on the engine and welded nipples on
them for the turbo so I always have coolant going to the turbo.
The PS lines were shortened, as the
gear driven pump is much closer and on the proper side now. I cut
the existing steel lines and welded them together with a torch.
The reservoir that was bolted to the intake manifold was in the way
with the brake master cylinder. I removed it and bolted it to the
left fender above the pump/steering gearbox area using a piece of angle
iron as my mount and using existing holes in the fender (that already
had bolts in them from the old external voltage regulator).
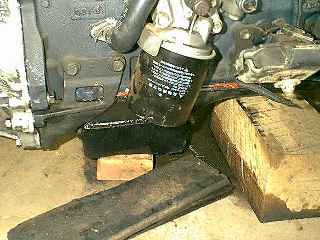
I had to cut off the "wings" on the
oil pan to accommodate the PTO drive shaft on the left side and the
front axle drive shaft and differential on the right. I had
to weld and braze some flat 1/8” steel in place of the wings. I
also removed the oil level sensor and welded that hole shut.
Actually I had to weld it twice. The first time I welded it from
the inside. It leaked so I welded it on the outside. I
would recommend that you just leave it in place as I have welded it on
the inside and outside and it weeps from somewhere. Note: the top
of the oil pan that gets bolted to the block is brazed to the lower
section that has the wings so you need to be careful in welding that
you stop near the braze then braze it. You might just be able to
braze it all if you wanted.
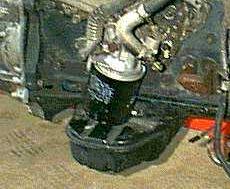
oil pan with
wings
oil pan without wings
The airbox to turbo hose was
fabricated from existing air intake tubing from the 3F. It helps
make things look stock that way too. I also drilled a hole and
welded a nipple near where the rubber intake hose attaches to the lid
of the air filter canister. I did this to attach the crankcase
breather as far away from the filter so if it pushes a little oil
through the breather it won’t soak the air filter.
My first
impressions: The engine runs very well. It
starts on the first cylinder that comes up on compression. The
diesel engines I had owned in the past all had glow plugs (VW Rabbit,
Ford F250 4x4) and were harder to start. This direct injection is
nice! The turbo whistles quite a bit more than I expected when I
only had a short pipe on it. Now that I have a 2 1/2" exhaust
with a hollow muffler it's barely even audible. The only time I
hear it now is when I am climbing up a steep hill or accelerating
quickly and I have my foot
heavy on the accelerator. The cold idle cylinder on the injection
pump needed adjusted and lubed and now that's working like it
should. A cold start brings the engine up to a fast idle, then it
goes to a slow idle after a minute to two. The Landcruiser drives
really well now. The H55F is a great transmission with the 3F and
even more so with the 14BT. I shift from fourth to fifth gear at
about 90 km/h (56 mph) and it's easy to get to 120kmh (it feels a bit
tipsy at that speed but it has a lot more rpm's left in the engine to
go a lot faster if wanted). I am not brave enough to take the SWB
much faster than that especially on these bias ply tires I run.
First gear is a nice "granny" gear now that I have a lot of low-end
torque and I still usually start from a stop in second gear.
My first trip was on a mountain road
(dirt, lots of mud, very rough, second and third gear most of the way)
and I got 24 mpg (10.5 km/L). On my first "highway" trip
(remember this is Bolivia and there are no real highways) I got 28 mpg
(11.7 km/L). I thought I would have to extend the fan shroud
since this engine sits back so far. I swapped the temperature
sending units from the 3F to the 14BT so I know it works the same on
12v. The temp comes up to between 1/3 and 1/2 scale deflection on
the gauge and never gets hotter. Now I can lug up a mountain or
stay on a mountain trail in second gear for hours, or idle along and
that's where the temp stays. I ended up extending the shroud
because I now have an AC condenser in front of it. Without AC it
wouldn't be necessary. By the way, the 3F used to just sit above
cold on level ground then rise to ¾ scale deflection while
climbing a long mountain pass.
The engine has plenty of
power. I can cruise up mountain passes as fast as I wish and
still get 28 mpg. The only difference now is to accelerate out of
a climbing curve you have to initiate the acceleration when entering
the curve to give the turbo some time to spool up and build some boost
pressure. It is a dream on the trails (aka Bolivia secondary
roads) as it has a lot of low RPM grunt.
My total expense in the swap, which
includes the engine, airfreight shipping, all the steel for mounts,
spacers, hoses, tubes, welding supplies, a custom bent 2 1/2" exhaust
from turbo to tailpipe including a custom hand made muffler, came to a
total of $2602.27 USD (2002 prices). See my listing below.
I am very pleased with how this swap
went. It took me about a week and a half to complete the majority
of work. There are always little things to do afterwards like
fixing leaks etc. It's nice having as much power as you could
want now and get great economy. In a nutshell, is this swap worth
the bother? For my application here it is an excellent swap if
you want to gain very usable power and not go to the fuel pump so often
for a fill-up. Out in the “boondocks” of Bolivia you can always
find diesel fuel but it can be very hard to find gasoline. It’s
nice to keep it as Toyota as possible so the reliability is high.
If you want to contact me with
questions or clarifications you can email me at N8ZUZ1 “at” yahoo.com
but be aware that I don’t check that email address more than about once
a week.
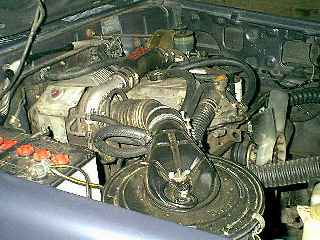
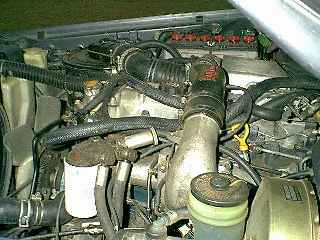
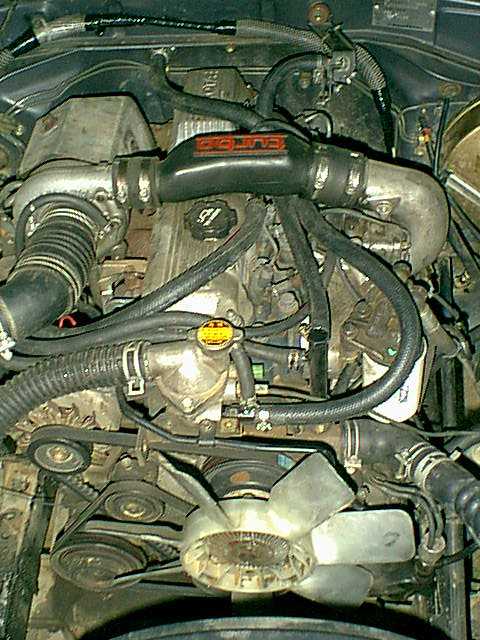
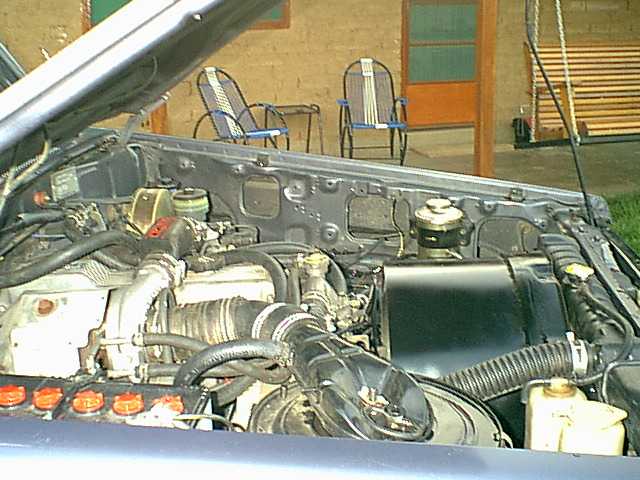
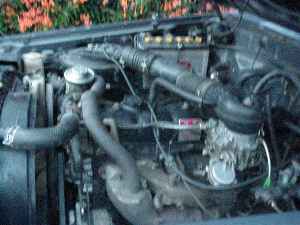
Misc. random shots:
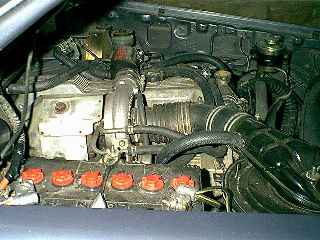
Engine in
place
view from above
note the gap between the fan and shroud
you can see my breather line
to
air-box
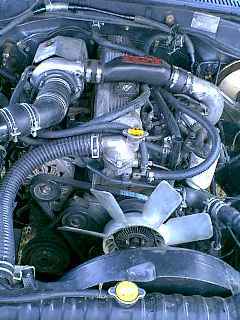
Injection side
shot
another frontal shot
Engine in place ready to weld in
mounts
The CT-26 turbo
Here's the welded PS line (can you
find my
weld?)
Here's the fan shroud and PS reservoir
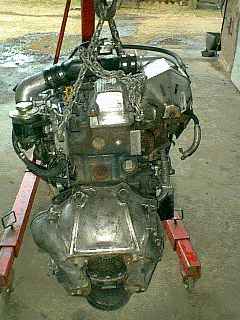
Backside before install
Injection side before install
Lest I forget, here's the old 3F in
place (sorry it's fuzzy) now
for sale…sold!
Expenses in 2002 US
Dollars: Engine = $2150.00 (included 12v
starter, “jake” brake, 13b bell housing, fuel filter holder etc) Airfreight = $142.80 3m Vacuum brake booster hose, 4m
Fuel line, 3m Heater hose, 1m Hydraulic hose w/banjos for fuel filter =
$49.86 New rear main seal = $4.17 New Throw-out bearing = $21.25 Fuel filters (2) = $9.44 Slave cylinder for clutch using the
13B for an example $22.00 Formed hose for turbo drain oil (my
metal one was damaged in shipping) $3.33 Fuel Solenoid 12v $28.00 Longer battery positive wire $13.19 Electrical tape (4 rolls) $2.78 Silicone $3.06 Longer bolts for bell housing $5.83 Radiator outlets changed $5.56 Radiator hoses $13.61 Exhaust 2 ½"from engine to
tail with hand made hollow muffler $61.64 Misc expenses including hose clamps,
electrical connectors, welding rods/MIG time, and hardware $87.00 Total: $2602.27
I hope this writeup helps someone that wants to do a similar swap or
that it encourages someone to go ahead and make that "perfect" cruiser.